4-Link
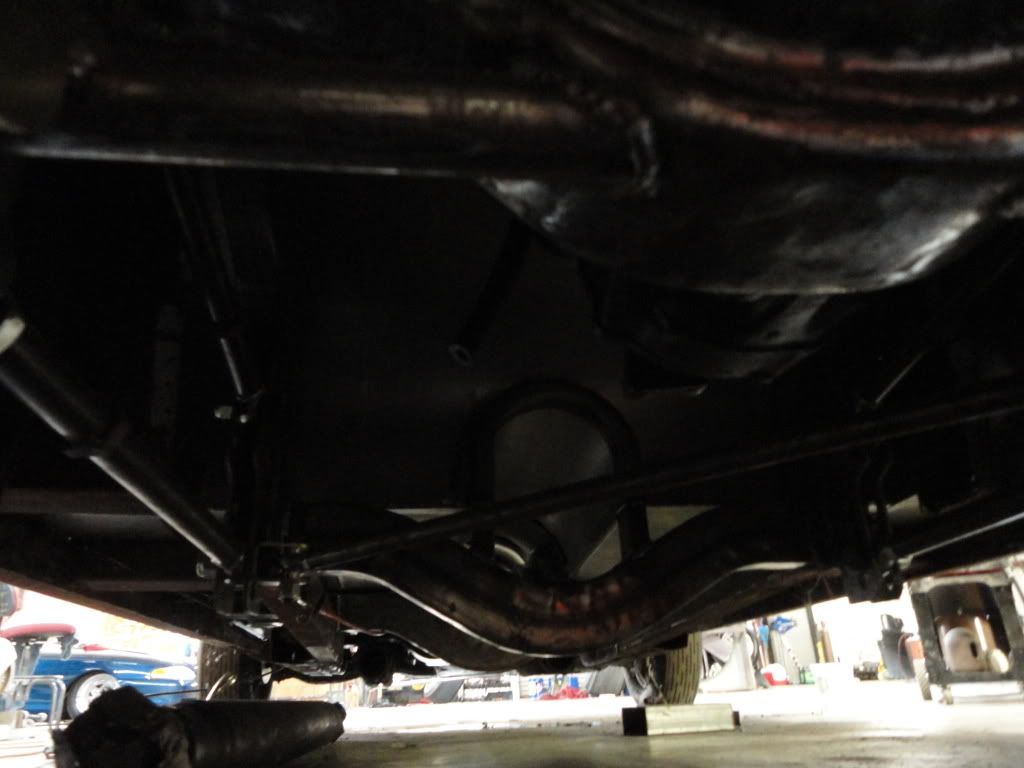
Ok, here it is. The first thing i did is jack the car up the same amount on each corner and rearend housing (about 12") and put jackstands under the car, to ensure that all the work i would be doing would be at ride height. Then i unbolted the leaf springs from the perches, and cut the perches off the the frame and rearend housing.
Since the existing 9" Ford housing was already narrowed for big tires, i had to cut the 4-link brackets in half and tack the 2 halves to the rearend axle tubes at the same width as the existing sub-frame connectors; and b/c my axle tube diameter was larger than the 4-link bracket holes, i had to enlarge them. Also, i welded them to the housing so that the yoke was centered with the tranny output shaft.
Then i welded the frame rail assembly together outside of the car to ensure it was square. (
http://www.summitracing.com/parts/CEE-3060/).
The existing subframe connectors were simply 2x3 tubing welded to the front clip; so i left the rearend in place, and measured the tubes that came with the Competition Engineering 4-Link kit (
http://www.summitracing.com/parts/CEE-2017/) and hiems (
http://www.summitracing.com/parts/CEE-6162/) & (
http://www.summitracing.com/parts/CEE-6163/), and just cut the sub-frame connectors. Before cutting, i dropped several plumb-bobs to make sure that the rearend was square in the car. For the measurement on where to cut the sub frame connectors:
*i measured the eye-to-eye length of an assembled a 4-link bar (heim-tube-heim) with the heims threaded halfway in
*then i added the 3" to compensate for the frame rail weldment (which is 2x3)
*then added the measurement of "the middle 4-link
rearend bracket hole to the middle of the axle tube"
*then i added the mesurement of "the middle 4-link
frame bracket hole to the edge of the bracket"
Then i welded the frame rail assembly to the subframe connectors, and to the rear of the car. I then welded a dropped crossmember at the joint to tie the subframe-connectors and frame rail assembly together.
http://www.summitracing.com/parts/CEE-3061/ I also welded another drop crossmember in between the subframe connectors at the point where they weld to my front clip (about 10" behind the tranny output shaft). I then purchased a 1x2 drive shaft loop and welded the halves on top of each dropped crossmember; i called and asked Checkered Racing (great guys!) to just send me the 2 halves unwelded.
http://stores.checkeredracing.com/Detail.bok?no=27 I also purchased/installed Competition Engineering's Diagonal link kit.
http://www.summitracing.com/parts/CEE-2052/
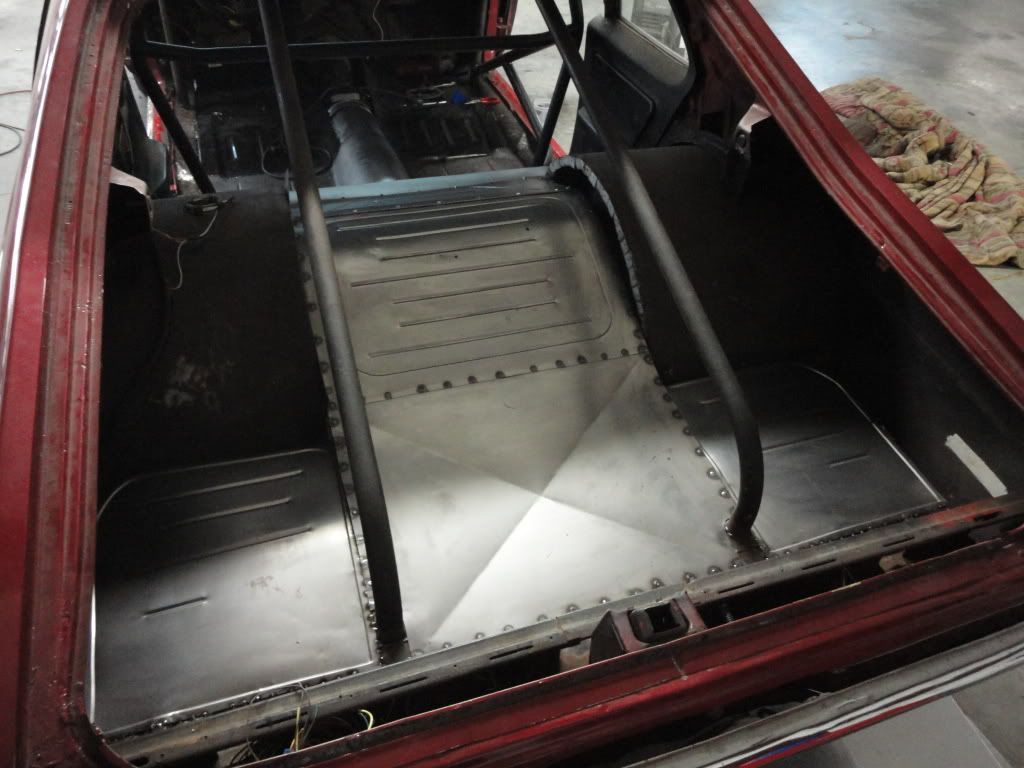
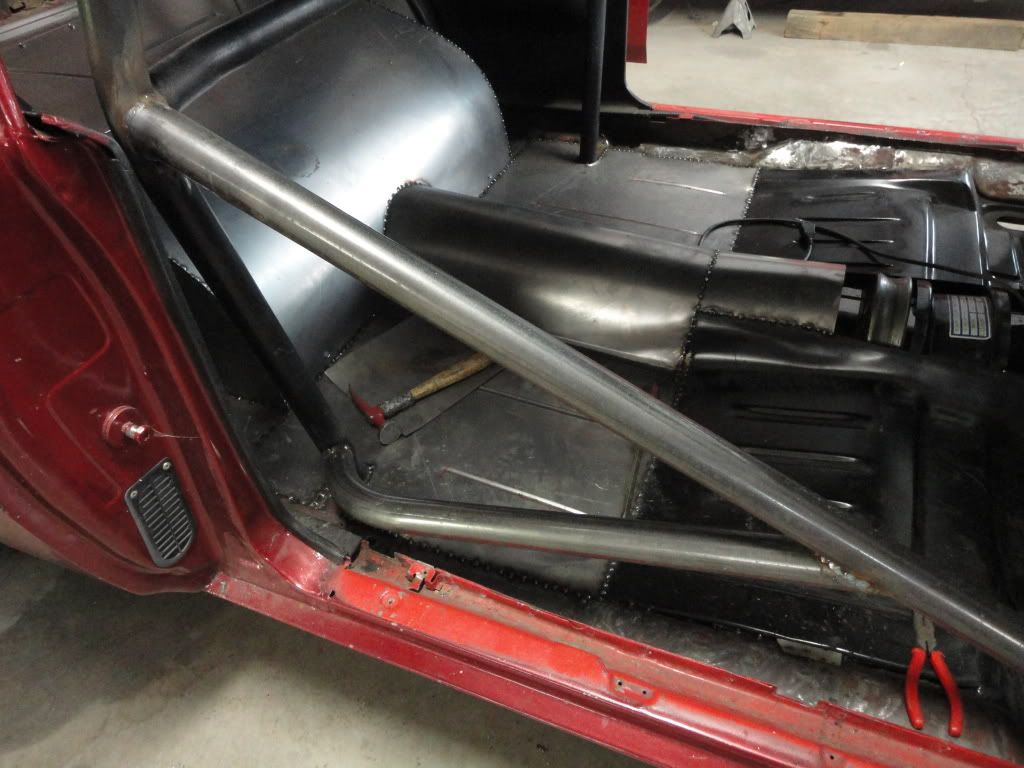
Then i bolted in a new floor pan support.
http://www.summitracing.com/parts/GMK-4012-517-681/
I also welded patches over any small holes (rust) in the rocker panel and sanded smooth.
Next, i tacked the shock mount brackets from QA1's Shock Mount Kit in place in a way that my coilovers were perpendicular to the ground, and as wide as i could make them.
http://www.summitracing.com/parts/HAL-MT100K/ Then pulled the rear end out, and hard-welded everything. I also welded 1.25"O.D., 1/8"wall through the 4-link brackets, through the shock brackets, and into the side of the rear end housing to tie it all together.
I also used a hole saw bit to cut a hole in the frame rails for the bushings in Competition Engineering's Anti-Roll Kit (
http://www.summitracing.com/parts/CEE-2041/). I am waiting untill the car is completely finished and all weight has been added until i weld the anti-roll brackets to the rear-end housing. Currently, the floor pan is 95% finished (all that lacks is the tunnel). I bought the LH/RH floor pans and cut them where they started to dip down and touch the subframe connectors (which would be the part that starts to angle down towards the back where the rear passengers' feet would be).
http://www.summitracing.com/parts/GMK-4012-500-68L/ http://www.summitracing.com/parts/GMK-4012-500-68R/ The rollcage is the current task. Both rollcage and floor pan courtesy of renowned drag racer Sonny Smart of Tellico Plains, Tennessee.